Client Preview: Branding & Theme
Your branding is what makes a Client Preview look like your studio instead of a generic page. You set it once and it applies to every link you create.
Where to set it
Open your account dashboard and go to the Client Preview tab. The Branding form there controls how all your preview pages look.
Branding fields
- Brand name — your studio or business name, shown in the page header and footer (up to 80 characters).
- Logo — an image file up to 1 MB (PNG, JPEG, or WebP). It's scaled down and shown at the top of every preview page. A preview of the current logo appears next to the field.
Click Save branding to apply. Changes affect every link, including ones you've already sent.
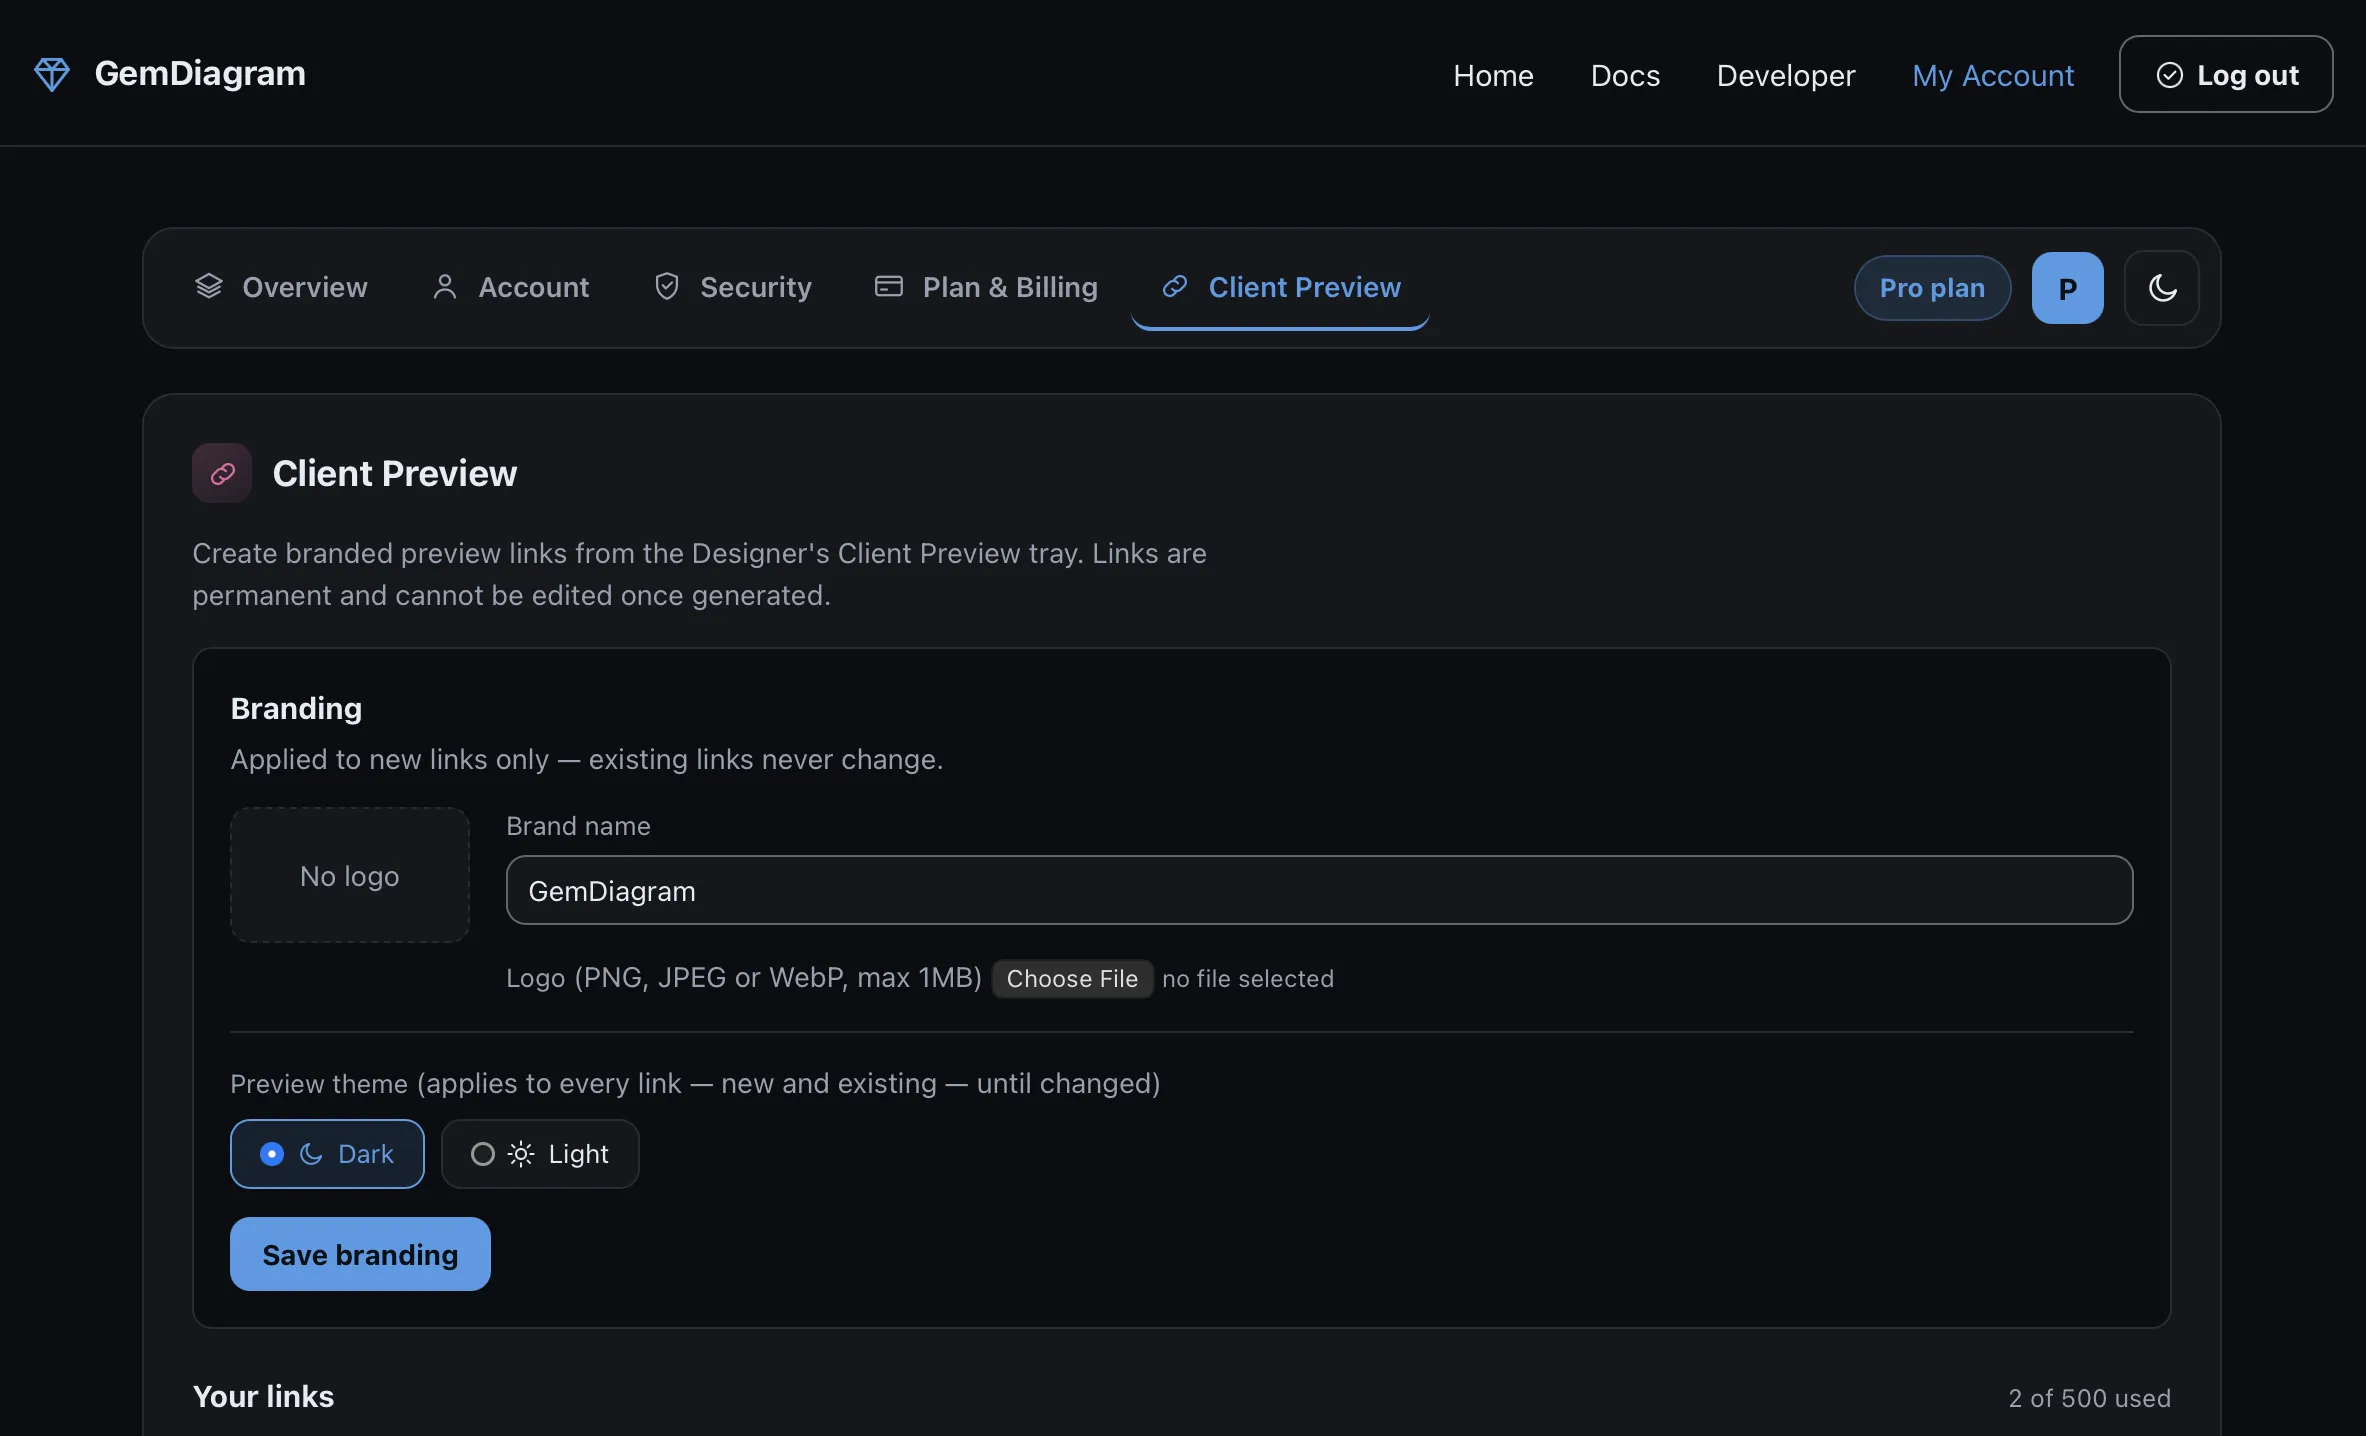
Preview theme
The Preview theme control is a pair of options — Dark and Light — that sets the default color scheme for your preview pages. The form labels this clearly: the theme "applies to every link — new and existing — until changed."
In other words, the theme is a single studio-wide default, not a per-link setting. Switch it from Dark to Light and every preview page you've ever generated re-themes the next time it's opened. New accounts default to Dark.
Note
A visitor to your preview page can flip between light and dark for themselves using the sun/moon toggle on the page. That choice is saved only in their own browser — it never changes your default or what other viewers see.
Putting it together
Set your brand name and logo, pick the default theme, and save. From then on, every link you generate in Creating & Managing Links carries this branding automatically, and you can update it any time without touching individual links.